
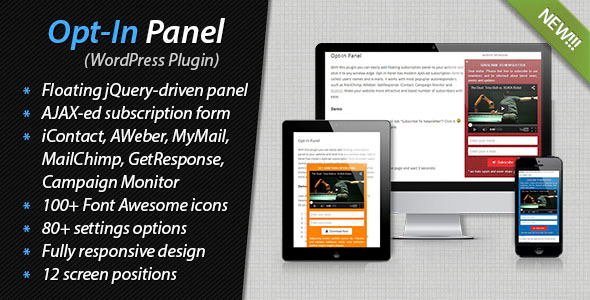

With this plugin you can easily add floating subscription panel to your website and stick it to any window edge. Opt-In Panel has modern AJAX-ed subscription form to collect users’ names and e-mails. It works with most popuplar autoresponders, such as MailChimp, AWeber, GetResponse, iContact, Campaign Monitor and MyMail. Make your website more attractive and boost number of subscribers with ease.
Demo
Please visit Opt-In Panel demo page and check out how it works.
Features
- Floating subscription panel: add floating subscription panel to website.
- 12 screen positions: stick floating panel to any window edge.
- 80+ settings options: customize your Opt-In Panel through admin dashboard.
- 100+ Font Awesome icons: use any of 100+ icons for button and tab.
- Display on whole website: Opt-In Panel might be displayed on all website pages.
- Shortcode and PHP-driven: use shortcode and/or php-snippet to show panel on certain pages only.
- Subscription form: AJAX-ed name/e-mail subscription form.
- Autoresponders supported: MailChimp, AWeber, GetResponse, iContact, Campaign Monitor and MyMail supported.
- Responsive design: Opt-In Panel looks nice on small screen devices.
- Auto-expanse option: Opt-In Panel might be automatically expanded with defined delay.
- Auto-close option: Opt-In Panel might be automatically collapsed after successful subscription.
- Remember the state: Opt-In Panel rememebrs the state for each visitor.
- Intro content supported: insert any HTML-content above subscription form.
- Conclusion supported: insert any HTML-content below subscription form.
- Image as a tab: set any image as a tab.
- Color customization: easily customize the color of any element.
- Admin notification: automatically notify administrator about new subscribers.
- Thanksgiving message: automatically send thanksgiving message to new subscribers.
- CSV Export: list of subscribers can be exported as CSV-file to be used with any newsletter systems.
- Easy to install: install and activate the plugin as any other plugins.
- Translation ready: plugin might be translated to any language.
- WordPress Best Practices: no any alerts from Plugin Check and WP_DEBUG.
Installation
- Install and activate the plugin. Once activated, it creates menu “Opt-In Panel” in left side column in the admin area.
- Click left side menu “Opt-In Panel >>> Settings” and configure Opt-In Panel.
- Enjoy your popups.
Configuration
After activation plugin creates left-side menu “Opt-In Panel” in WP dashboard. Go to “Opt-In Panel >>> Settings” page and configure the plugin. On this page you can find the following sections:
- General Panel Settings: opt-in panel position, width, colors and HTML-content.
- Subscription Form Settings: input fields placeholders, button labels, colors and button icon.
- Tab Settings: tab label and icon, colors and tab image.
- Behavior Settings: auto-expanse and auto-close options.
- Mailing Settings: notification and confirmation settings.
- Autoresponders Settings: MailChimp, AWeber, GetResponse, iContact, Campaign Monitor and MyMail settings.
Support
If you have problems regarding using the plugin, please contact me and I’ll help you.
Credits
- Fugue Icons [icons]
- Font Awesome by Dave Gandy – http://fontawesome.io/ [icons]
