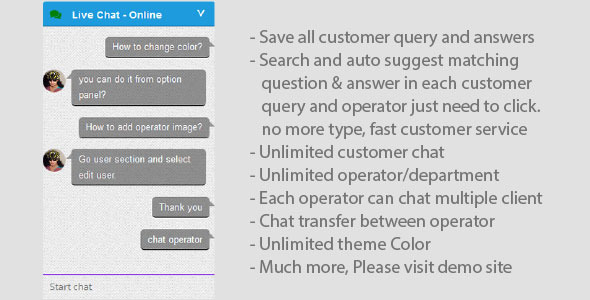
Social networking August 28, 2015August 28, 2015alexNo Comments Clever WordPress Are living Chat Plugin (Social Networking) Live PreviewPurchase 23.00 Read More
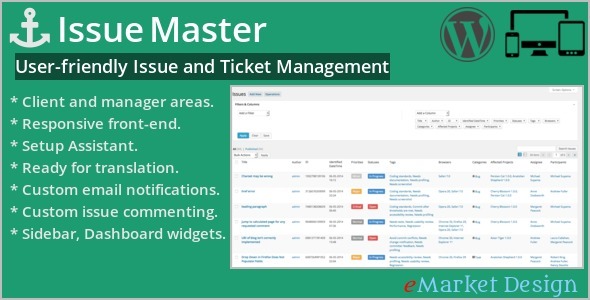
Miscellaneous December 16, 2014December 16, 2014alexNo Comments Problem Grasp (Miscellaneous) Live PreviewPurchase 22.00 Read More
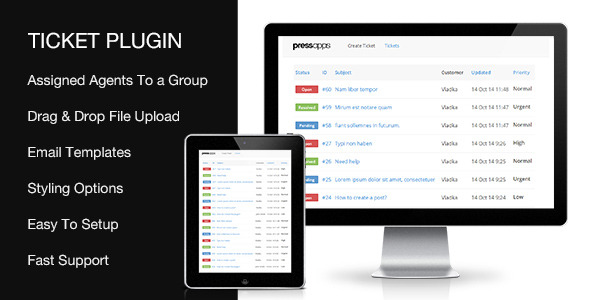
Miscellaneous October 16, 2014October 16, 2014alexNo Comments Ticket Toughen WordPress Plugin (Miscellaneous) Live PreviewPurchase 18.00 Read More
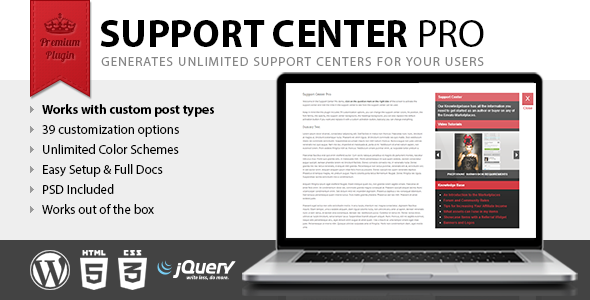
Interface Elements March 14, 2014March 14, 2014alexNo Comments Toughen Middle Professional (Interface Parts) Live PreviewPurchase 16.00 Read More