Add-ons November 29, 2017November 29, 2017alexNo Comments AshElement-Elementor Web page Builder Bundle (Add-ons) Live PreviewPurchase 17.00 Read More
Calendars November 21, 2017November 21, 2017alexNo Comments Developed Experience Supervisor – WordPress Calendar Plugin (Calendars) Live PreviewPurchase 24.00 Read More
Social networking October 12, 2017October 12, 2017alexNo Comments Flexi Social Map – show the map of your Instagram trip (Social Networking) Live PreviewPurchase 19.00 Read More
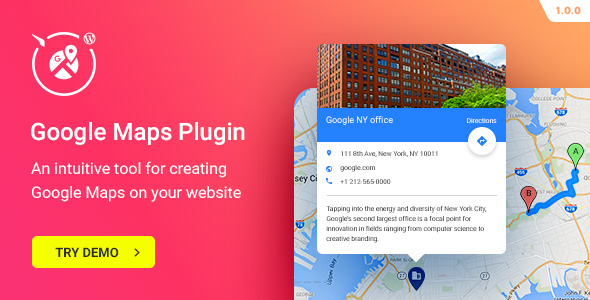
Utilities September 7, 2017September 7, 2017alexNo Comments wordpress Google Maps – Map Plugin for WordPress (Utilities) Live PreviewPurchase 19.00 Read More
Add-ons August 8, 2017August 8, 2017alexAdd-onsNo Comments JetElements – Addon for Web page Builder Elementor (Add-ons) Live PreviewPurchase 12.00 Read More
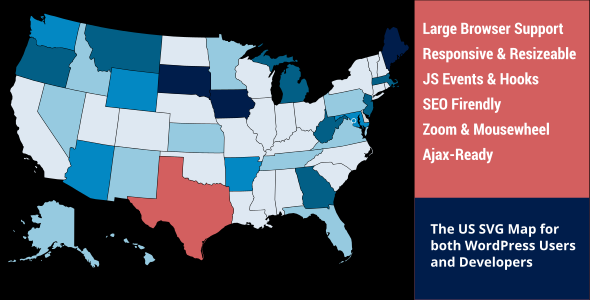
Utilities May 11, 2017May 11, 2017alexUtilitiesNo Comments US Clickable SVG Map (Utilities) Live PreviewPurchase 26.00 Read More
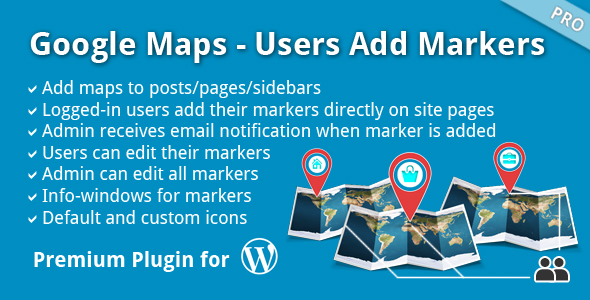
Miscellaneous April 24, 2017April 24, 2017alexNo Comments Google Maps – Customers Add Markers (Miscellaneous) Live PreviewPurchase 25.00 Read More
Add-ons April 24, 2017April 24, 2017alexNo Comments CreaMaps (Add-ons) Live PreviewPurchase 23.00 Read More
Add-ons April 17, 2017April 17, 2017alexNo Comments Alchemy Addons for Visible Composer (Add-ons) Live PreviewPurchase 18.00 Read More
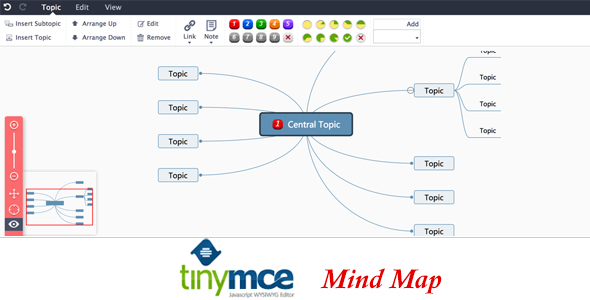
Advertising February 28, 2017alexNo Comments TinyMCE4 MindMap Editor (Rankings and Charts) Live PreviewPurchase 15.00 Read More