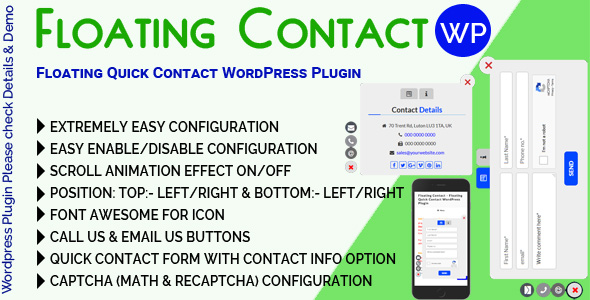
Forms September 10, 2018alexNo Comments Floating Contact – Floating Quick Contact WordPress Plugin (Forms) Live PreviewPurchase 15.00 Read More
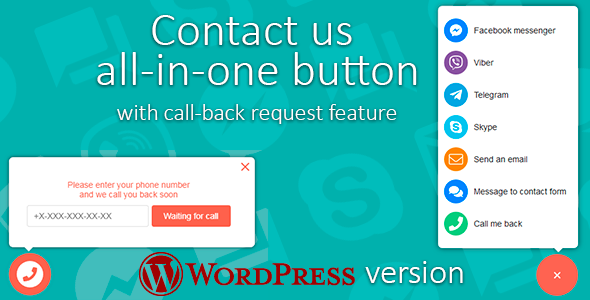
Widgets July 18, 2018alexNo Comments Contact us all-in-one button with callback request feature for WordPress (Widgets) Live PreviewPurchase 18.00 Read More
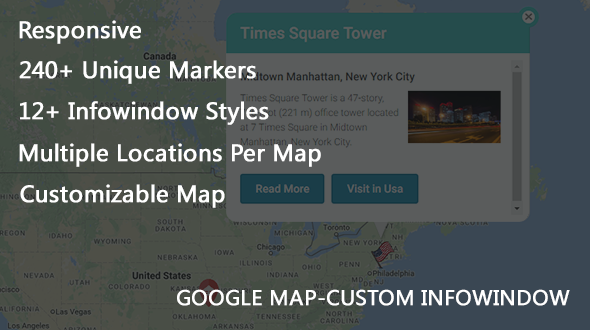
Utilities May 24, 2017May 24, 2017alexNo Comments Customized Information Window for Google Map plugin (Utilities) Live PreviewPurchase 14.00 Read More